
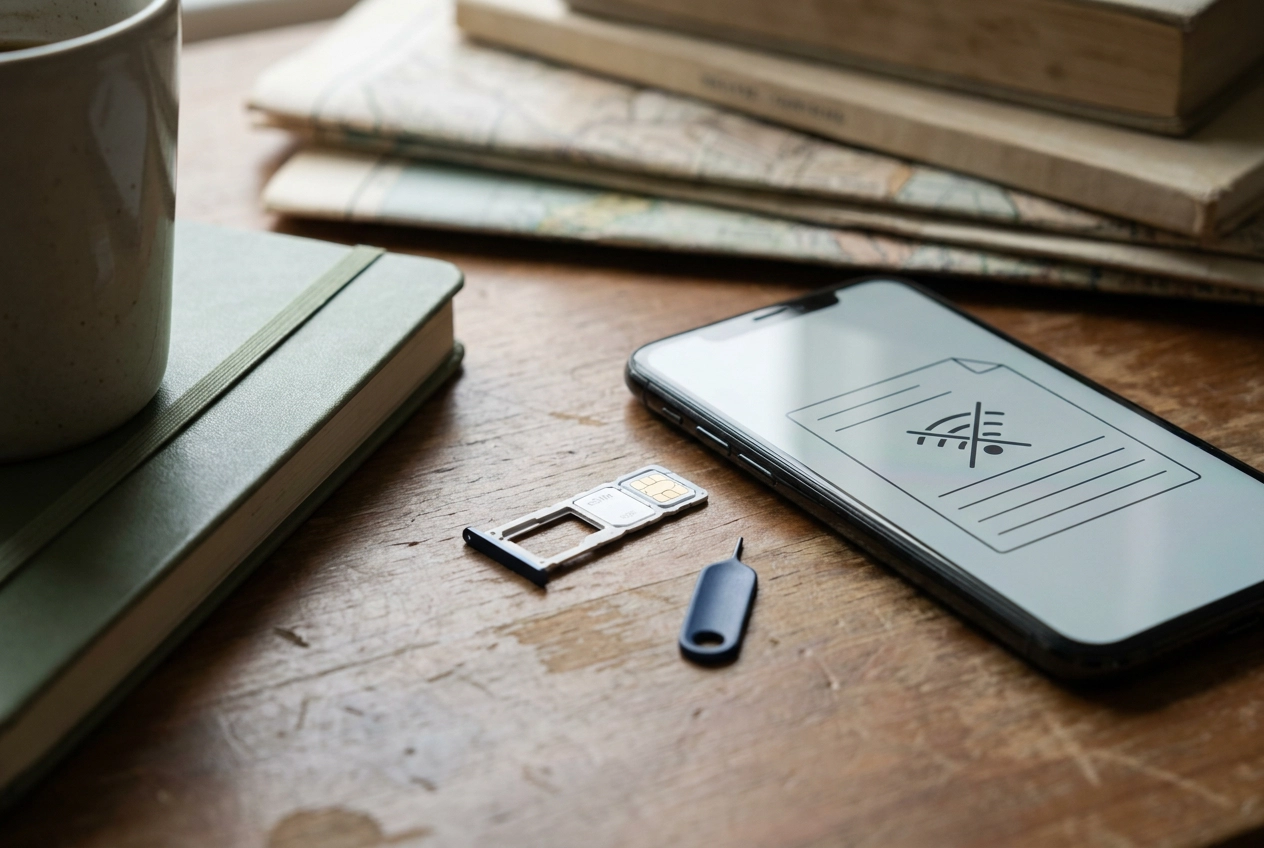

You’ve just bought an eSIM data plan, scanned the QR code, followed every step, and now your phone is sitting there with no signal and no idea what went wrong. Sound familiar? You’re not alone, and more importantly, it’s usually a fixable problem once you know where to look.
The frustrating thing about eSIM activation issues is that most online advice stops at “restart your device and try again.” That’s rarely the actual solution. Real activation failures tend to come from a handful of specific causes: carrier profile errors, incorrect APN settings, or a device that’s still locked to another network. Once you know which one you’re dealing with, the fix is usually straightforward.
This guide is written specifically for Australian prepaid eSIM users who want real answers. You’ll work through a simple diagnostic process to pinpoint exactly where your activation broke down, then follow clear steps to fix it. We’ll also cover iOS and Android separately, flag the prepaid-specific issues that often get mistaken for activation errors, and explain when it’s time to reach out for extra help.
Why eSIM Activations Fail (And Why Generic Advice Doesn’t Help)
If your eSIM isn’t working and you’ve already tried restarting your phone, you’re in the right place. That advice fails because it treats every activation problem the same way, when in reality the fix depends entirely on where things broke down.
eSIM activation isn’t a single step. It’s a chain: your device is checked for eligibility, you scan a QR code to download a carrier profile, that profile installs onto your phone’s embedded SIM, APN settings configure your data connection, and finally your device registers on the network. A failure at any link in that chain can look identical from the outside, which is why “no service” after scanning a QR code could mean five completely different things.
For prepaid eSIM users in Australia, there’s an added layer of complexity. Plan status, top-up timing, and network provisioning delays can all kill connectivity in ways that look exactly like an activation failure. Misdiagnosing a lapsed plan as a profile error wastes time and leads to circular troubleshooting.
This guide works differently. Instead of throwing fixes at the problem, it isolates each layer in sequence so you know whether the issue sits with your device, your carrier profile, your APN settings, or your account status before you attempt anything. That sequence matters. Fixing your APN won’t help if the carrier profile never installed correctly.
If you’re using an EzySim prepaid eSIM plan, one more thing is worth knowing upfront: EzySim runs on the Vodafone network in Australia. That means Vodafone-specific carrier profile settings and APN values apply directly to your plan, and the steps in this guide are written with that configuration in mind.
Start Here: The eSIM Diagnostic Flowchart
Before attempting any fix, run through these five checkpoints in order. Each step depends on the one before it, so skipping ahead wastes time.
Step 1: Device compatibility and lock status Confirm your phone supports eSIM and is not carrier-locked or regionally locked. A locked device will reject any eSIM profile regardless of what else you try. This is the single most important check, and it costs you nothing to do first.
Step 2: Carrier profile download status Open your eSIM settings and confirm the carrier profile is listed as active, not pending or failed. If the profile hasn’t installed correctly, nothing downstream will work. No amount of APN adjustments will fix a profile that isn’t there.
Step 3: APN configuration A successfully downloaded profile does not automatically guarantee the correct APN settings are applied. Check that your Australian prepaid APN values are in place. This is the step most guides skip entirely, and it’s a very common reason data doesn’t work even when the profile looks fine.
Step 4: Network registration Confirm your device is registering on the Vodafone network and is not stuck searching or showing SOS only. This is a separate layer from the carrier profile; both need to be working.
Step 5: Plan and account status For prepaid eSIM Australia users, verify your plan is active, your top-up has been processed, and your data balance hasn’t been exhausted. A plan that has expired produces symptoms identical to an activation failure.
Working through these steps in sequence matters. Each section that follows covers one step in detail, with specific fixes for iOS and Android. Start at Step 1 and move forward only when each layer is confirmed clear.
Step 1: Check Device Compatibility and Lock Status
Before scanning any QR code, confirm your device can actually run an eSIM. Not every phone supports it, and compatibility varies by region, carrier, and handset variant.
Check your manufacturer’s official support page to confirm your specific model supports eSIM, compatibility varies by region, carrier, and handset variant.
Carrier Lock vs. Device Lock
These are two separate problems, and both will stop an eSIM activation dead.
A carrier-locked phone is tied to its original network. It will reject eSIM profiles from any other carrier, including EzySim. A regionally locked device (common with handsets imported from the US, Japan, or parts of Asia) blocks eSIM activation entirely, regardless of which carrier’s profile you’re trying to install. Regional locks require contacting the original carrier or retailer to remove.
How to Check on iPhone
On iPhone, check your SIM lock status in your device settings (Apple’s support pages document the exact path for your iOS version) and look for a “No SIM restrictions” indicator. Anything else means the device is locked and must be unlocked before eSIM activation will work.
How to Check on Android
On Android, your IMEI number (accessible via your device’s dial pad) lets you run a carrier lock check through your manufacturer’s online tool. Samsung, Google, and most major OEMs offer one online; you can also contact the carrier the phone was originally purchased through.
A Note on International Devices
Devices purchased overseas are the most common source of lock-related failures for Australian prepaid users, always verify lock status before activating. If you bought your phone abroad, verify its lock status before you do anything else. If you’re starting fresh, how to activate an eSIM in Australia is a useful reference for the full process once your device is confirmed unlocked and compatible.
Device passes both checks? Move on to Step 2 and diagnose the carrier profile.

Step 2: Diagnose and Fix Carrier Profile Errors
Your device is unlocked and compatible. Now the next most common culprit: the carrier profile itself.
A carrier profile error happens when the eSIM profile fails to download completely, lands in a pending state, or conflicts with a leftover profile from a previous activation or device reset. The symptoms look identical to other failures, so you need to check the profile status directly.
Check Profile Status on iPhone
Go to Settings > Mobile Service (or Cellular on some iOS versions) and look for your eSIM label in the list. If the plan shows as Not Active, or the label is missing entirely, the profile did not install correctly and needs to be re-downloaded.
Check Profile Status on Android
On Samsung, go to Settings > Connections > SIM Manager > eSIM. On Pixel, it’s Settings > Network & Internet > SIMs. A failed profile appears greyed out or absent. A pending profile may be listed but show no network operator name underneath it.
How to Re-Download the Profile
- Delete the failed eSIM entry from your device’s SIM or eSIM settings.
- Return to your EzySim activation email or account portal to retrieve your QR code.
- Connect to a stable Wi-Fi network before scanning.
- Scan the original QR code, not a screenshot of it. Some devices misread compressed images and the download fails silently.
Important: Most eSIM QR codes are single-use. If yours has already been scanned once, even unsuccessfully, it may be spent. Contact EzySim support to request a reissue before attempting the scan again.
Why Profiles Fail to Install
The three most common causes are: a weak or dropping Wi-Fi connection mid-download; scanning a screenshot instead of the original QR source; and activating on a device that was recently factory reset without first deleting the previous eSIM profile. That leftover profile can block a fresh installation.
After a Successful Download
Once the profile appears as active, toggle the eSIM off, then back on in settings. This forces the device to re-register on the network from scratch and clears any residual provisioning delay. If you’re weighing up plans before activating, it’s worth reviewing what different cheapest prepaid eSIM options in Australia actually include so you’re not troubleshooting a plan that doesn’t suit your needs in the first place.
If the profile is active but you still have no data, the issue has moved downstream to APN settings.
Step 3: Configure APN Settings for Australian Prepaid eSIM
With your carrier profile confirmed and active, the next hurdle is often invisible: your eSIM shows as connected, yet mobile data simply doesn’t work. This is almost always an APN issue.
What is an APN? The Access Point Name tells your device how to route data through your carrier’s mobile network. Wrong or missing values and your device has no path to the internet, even with a perfectly installed profile.
Correct APN Settings for EzySim Users
EzySim runs on the Vodafone network in Australia. Whether you’re on a prepaid eSIM data plan or a physical SIM, the APN values are identical:
The values below reflect commonly cited Vodafone Australia prepaid settings; confirm the current values with EzySim support or your account portal before entering them manually.
| Field | Value |
|---|---|
| APN | vodafone |
| Username | (leave blank) |
| Password | (leave blank) |
| MMSC | http://pxt.vodafone.net.au/pxtpublic |
The MMSC value only matters for MMS (picture messages). For mobile data, the APN field is what counts.
Checking APN on iPhone
On many iPhone models, APN settings are applied automatically when the carrier profile installs. If data isn’t working, go to Settings > Mobile Service > Mobile Data Network and confirm the APN field reads vodafone (all lowercase).
If the Mobile Data Network option isn’t visible at all, your carrier profile likely didn’t install fully. Return to Step 2 and re-download the profile before continuing here.
Configuring APN on Android
Android doesn’t always auto-populate APN settings. Go to Settings > Connections > Mobile Networks > Access Point Names. If the list is empty or the existing entry looks incorrect, tap the + icon and enter the Vodafone prepaid values from the table above. Save the entry, then set it as the active APN.
Testing After You Save
Toggle mobile data off, wait five seconds, then turn it back on. Open a browser and load a webpage you haven’t visited before. Don’t use a speed test app for this check as cached results can give a false positive. A fresh page loading successfully confirms your APN settings are working.
If you’re weighing up your plan options alongside this setup, the EzySim guide to prepaid mobile plans in Australia breaks down how to match data needs to the right plan before you commit.
Step 4: Fix Network Registration and Signal Problems
If your carrier profile is installed and APN settings are confirmed correct but your phone still shows No Service, Searching, or SOS Only, you’re dealing with a network registration problem. This is a separate failure layer, and the fixes are different.
Force a Fresh Network Search
Start with Airplane Mode. Enable it, wait 15 seconds, then disable it. This clears your device’s stored network selection and forces it to search for a tower from scratch. In most cases, the phone reattaches to the Vodafone network within a minute or two.
Select the Network Manually
If toggling Airplane Mode doesn’t help, try selecting Vodafone manually rather than letting your device choose automatically.
- iPhone: Go to your eSIM’s network selection settings (under Mobile Service or Cellular depending on your iOS version), turn off Automatic, and select Vodafone AU from the list.
- Android: Go to your mobile networks settings (path varies by Android brand and version), search for available networks, and select Vodafone AU.
Sometimes devices latch onto an incompatible network signal. Selecting manually overrides that.
Check for Dual-SIM Conflicts
Running a physical SIM and an eSIM at the same time can cause the device to route data through the wrong line. Go to your SIM Manager settings and confirm the eSIM is set as the preferred data line. Both iOS and Android let you assign data preference per line.
Allow Time for Provisioning
On prepaid plans, network registration can take some time after first activation to fully propagate. If your signal is flickering rather than completely absent, this is likely the cause. Wait, retry, and avoid escalating until the connection has had a reasonable chance to settle.
Confirm Coverage at Your Location
If none of the above resolves it, check whether Vodafone actually covers your location. Regional and rural areas can have limited or no Vodafone signal, and no amount of device-side troubleshooting will fix a coverage gap. Use the Vodafone coverage checker online to verify your location.
Step 5: Prepaid-Specific Failures That Look Like Activation Errors
If your device is registering on the network correctly but you’ve suddenly lost service, shift your diagnosis away from the device entirely. For prepaid eSIM Australia users, the most common culprits are plan expiry, an exhausted data balance, and top-up timing gaps.
Plan Expiry
EzySim prepaid plans have defined validity periods, check your plan details for the exact expiry on your chosen plan. When a plan expires, data and calls stop immediately. The eSIM profile stays installed and active on your device, so your phone looks connected but nothing works. This trips up a lot of people because the eSIM settings look completely normal.
How to Check Your Plan Status
Log into your EzySim account or open the confirmation email you received at activation. Your expiry date and remaining data balance are both visible in the account dashboard. Check this before touching any device settings. If your eSIM was working fine yesterday and has gone dark today, plan status is almost always the explanation.
Top-Up Timing
Renewing your plan close to the expiry date can create a brief connectivity gap while the network re-provisions your account. This is normal prepaid behaviour, not a fault. Allow a short time after topping up before assuming something has gone wrong. If you’re choosing or switching plans, the guide to best prepaid mobile plans in Australia for 2026 covers how EzySim’s options compare so you can pick the right validity period upfront.
Data Rollover
EzySim offers data rollover on eligible prepaid plans. If your rolled-over data isn’t showing after renewal, wait a short time before contacting support. Balance updates aren’t always instant on the back end.
The Key Diagnostic Rule
If your eSIM was working and stops suddenly, start at your account dashboard, not your carrier profile. A working eSIM that goes dark is almost always a plan or account issue.
iOS-Specific eSIM Troubleshooting Steps
Once you’ve ruled out plan and account issues, it’s time to look at iPhone-specific settings that can quietly block connectivity even when everything else looks correct.
Finding your eSIM in iOS settings
On iPhone, go to Settings > Mobile Service. Each eSIM you’ve installed appears as a separate line with its own label, a data toggle, and individual settings. If you have more than one eSIM, confirm you’re troubleshooting the correct line before changing anything.
No network name showing next to the signal bars
This means your eSIM profile installed, but the device hasn’t registered on the network. Go to Settings > Mobile Service > [your eSIM label] > Network Selection, switch from Automatic to Manual, then search for and select Vodafone AU. This forces the iPhone to register on the correct network instead of searching indefinitely.
Missed a carrier settings update?
iOS occasionally prompts you to install a carrier settings update after eSIM activation. If you dismissed that prompt, navigate to your iPhone’s About page in General settings and wait a few seconds, if a carrier settings update is available, a prompt should appear. Installing it can resolve silent connectivity issues caused by outdated carrier configuration.
Reset Network Settings as a last resort
As a last resort, use the Reset Network Settings option in your iPhone’s reset menu. This clears Wi-Fi passwords, APN overrides, and VPN configurations, check whether it affects your eSIM profile on your specific iOS version before proceeding, as behaviour can vary. After the reset, check that your APN settings have auto-populated correctly; if not, re-enter them manually using the Vodafone prepaid values covered earlier in this guide.
Recently switched iPhones? Check your eSIM transfer
On recent iOS versions, eSIM profiles may transfer during device migration. If you moved to a new iPhone recently, verify the transfer completed fully. A partial transfer can leave the eSIM in a non-functional state on the new device, requiring a fresh activation.
Android-Specific eSIM Troubleshooting Steps
Android eSIM settings aren’t as consistent as iOS, so finding the right menu depends on your device brand.
- Samsung: Settings > Connections > SIM Manager
- Google Pixel: Settings > Network & Internet > SIMs
- Other Android brands: Look under “Mobile Network” or “Dual SIM” if you can’t find a dedicated eSIM menu
Greyed-Out Profile
If your eSIM profile appears in the list but is greyed out, tap it and toggle it on manually. Android sometimes downloads a profile in a disabled state, so network registration never starts until you enable it yourself.
Google Pixel: Activation Error After QR Scan
If you see an error message after scanning the QR code on a Pixel device, wait a few minutes before checking your SIM settings again, this is often a carrier provisioning delay rather than a device fault. Don’t scan the QR code again during this window.
Samsung Galaxy: Switching Network Mode During Activation
On some Samsung Galaxy models, switching from 5G to LTE/4G-only mode (in your mobile networks settings) during activation can resolve registration failures. Switch back to your preferred network mode once activation is confirmed.
SIM Toolkit Cache Fix
If your eSIM profile is active but carrier data is still not working, try clearing the SIM Toolkit app’s cache through your device’s app settings. This resets the application layer handling carrier communications without affecting your eSIM profile.
When to Escalate to EzySim Support
If you’ve worked through every device-side step above and your eSIM still isn’t connecting, it’s time to contact EzySim support. Here’s how to know when that threshold is reached.
Contact support immediately if your QR code returns a rejection error on scan. This is different from a slow download or a Wi-Fi dropout mid-install. A rejection means the code has already been used, has expired, or was generated for a different device IMEI. You cannot work around this from your phone; only EzySim support can reissue the code.
Escalate if a reasonable period has passed (several hours) and your profile installed successfully but the eSIM never registers on the network. A successful profile installation that never provisions is a back-end failure, not a device problem. No amount of toggling Airplane Mode or clearing caches will fix it.
Escalate if your account dashboard shows an active plan but you have zero data after completing all the troubleshooting steps in this guide. This points to a provisioning mismatch between your account and the network, which requires manual intervention on EzySim’s end.
What not to escalate
Save yourself the wait. Do not contact support for:
- Expired plan: renew directly through your EzySim account
- Exhausted data balance: top up online
- No data immediately after activation: allow some time for network provisioning before escalating
What to have ready before you contact support
Getting your information together before reaching out cuts resolution time significantly. Have the following ready:
- Your device model and OS version
- Your EzySim account number or activation email
- The exact error message from the QR scan or profile installation
- A brief summary of troubleshooting steps you have already completed
One last note: if you are already weighing your plan options or wondering how EzySim stacks up on value, the breakdown of Vodafone’s April 2026 prepaid price rises and how EzySim compares is worth a read before your next renewal.
Fix It Once, Stay Connected
If you’ve worked through the escalation criteria and your issue is resolved, you now have everything you need to handle eSIM activation confidently.
The five-step diagnostic sequence above covers the full failure landscape, work through it in order and you’ll isolate the fault without going in circles.
For those looking for a straightforward prepaid eSIM option in Australia, EzySim is worth a close look. Plans run on the Vodafone network with no lock-in contracts and simple online activation. The Cool plan delivers 60GB over 90 days for $39, which suits longer-stay users or anyone who wants fewer renewals to manage. Flexible shorter-term plans are also available if your needs change.
For cases that genuinely can’t be resolved from the device side, particularly QR code reissues and back-end provisioning failures, EzySim support is available to step in.
One last tip: bookmark this guide. eSIM troubleshooting isn’t a one-time problem. You’ll likely reference it again when you next switch devices, reset your phone, or activate a new plan. Having the diagnostic sequence ready saves real time when connectivity drops at the worst possible moment.
Conclusion
eSIM activation failures are frustrating, but they are almost always fixable once you know where to look.
Ready to get connected? Bookmark this guide, run through the diagnostic flowchart, and reach out to EzySim support if you hit a wall. You now have the knowledge to troubleshoot confidently, resolve issues faster, and stay connected wherever you are in Australia.